The Real McQueen
Posted: August 25, 2015 Filed under: Alexander McQueen, Dressmaking, Jackets | Tags: Alexander McQueen, Dressmaking, Jackets 8 CommentsAfter making the calico toile that Jess tried on for fit on my last visit I intended to make her a ‘real’ version of the jacket that could be worn out. Without all the tailor tacks. Her fabric choice was a very utility style khaki twill weave cotton that I had in my stash. I had originally thought it would be nice to make this in something wonderful but in retrospect Jess chose the right fabric for her as she wanted to wear this in a very casual fashion.

McQueen Kimono Jacket Front

McQueen Kimono Jacket Back
The pictures were taken very quickly before we went out for the day so I apologise for the quality. In addition to that Jess had done her marathon training before we arrived and had already run 8 miles that morning. I think I might have wanted to go back to bed rather than walk around Kew Gardens with the olds.
I think the jacket fulfills the ‘casual’ requirement – but I can see it will probably be returned from time to time to have the back pleats pressed properly again. The fabric does crease a bit (which has helps maintain the crisp folds to the back) and I imagine it may need to be freshened up on occasion. Jess asked for both fronts to be made the same length which I think looks pretty good. I am happy with the result and whilst I would still like to make this for myself at some point I am happy to put it away for a little while. Possibly a long while.
That is the finished report so if you have no interest in making this you can leave now if you want!
The making up details.
Whilst many people seem to be reporting that they have downloaded this pattern not too many seem to be actually making it – possibly put off by the scant (though fine) instructions provided by Show Studio with the download. I am sure that others have made this in slightly different ways I will share my experience.
As I said in my last post about this pattern I had the file printed at a copy shop which meant that I didn’t have to paste all the odd shapes myself and possible doubt my result. This I can recommend.
I needed 2.5m of 150cm wide fabric (although you could probably manage with 2.25 if you squashed a bit more, or made both fronts the same length like Jess wanted). The layout is fairly easy, I laid the main large piece in place and then fitted around that. The pieces are:
- Front and back combined. Cut 2
- Centre back panel. Cut 1 (I fitted mine in on the fold by folding the pattern piece in half).
- Back facing. Cut 2
- Front panels (Decorative) Cut 2
- Sleeves. Cut 2
- Collar/front. Right side piece Cut 1 (Unless you make both sides the same length in which case use only this piece and cut 2)
- Collar front. Left side piece Cut 1.
There appears to be a 1cm seam allowance included in the pattern pieces – I sewed the jacket with this in mind and all the pieces fitted as expected. The grainlines are marked on the pieces but not in the way of the big 4 style patterns. Look closely and you will identify them easily.
I printed out a copy of the instructions from the download file and worked with that. However, I did make a few changes to the order and did a couple of things with this jacket that helped make things clearer for me.

Mark the letters to match in coloured pen.

Use coloured thread on the coloured ‘x’ marks to make matching easier.
I marked the letters on the pattern which needed to be matched in coloured pen, the bulk of the tailors tacks can be made in one colour but I used threads to match the colour on the pattern to mark the coloured ‘x’ marks. This helped when I got further in to the instructions. Don’t skip making the tailor tacks – even the ones that don’t appear to have a purpose help to get the creases folded correctly later.
Following the pattern instructions.
- As instructed. I pressed the seams toward CB having clean finished them in lining to neaten as they are visible inside this unlined jacket.
-

Facing with CB marked
The photograph shows which edge of the pattern piece is CB. I got that wrong first time.
- After sewing into place I under-stitched to hold flat.

Bust dart back
- Bust dart instruction. I found this straightforward but not everyone seems to agree. Ensure that you sew the short seam between markers and then sew the long seam only as far as the clip markers – not all the way to the point which gives you a straighter shape to the front piece.

Bust dart front.
I sewed this along the front edge to hold all the edges flat after pressing.

Bust dart fold at armhole edge. (C & Y Markers)
- Points C & Y need to be folded down in direction with the right side of the piece facing you. This will now complete the bust dart and you can see how this will work on the body as you hold the piece up.
- This seems like the simplest instruction on the pattern, folding shoulder notches to make a dart. However, I looked closely at the photographs on the Show Studio page and this should just be stitched at the shoulder edge to create a tuck, not a dart like I sewed. I guess it is personal choice but the tuck looks nice.
- Point P joins with the bottom of the opposite point. This creates a dart which is pressed on the inside.
- As instructed.
- As instructed.
- One point N is the top of the part sewn in part 9.
- Point M-M. I had problems eventually pressing the tuck without this 1cm stitched section distorting the garment so I unpicked this and left it. The tailor tacks ensure that you are making the fold in the correct shape.
- See above.
- As instructed.
- As instructed.
- This is where it starts to look as if it might just become what you thought!
- Not Yet! I wanted to sew the sleeves into place and neaten the edges at the armhole edge before sewing the side seam – by waiting I thought I would get a tidier finish.
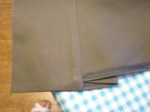
Front edge detail.
- Fold the pattern in half to determine the short edge. This is important and will impact later if you get it wrong. I clean finished the bottom edge only before hemming.
- I clean finished the bottom of both piece 1 before hemming these separately from piece 4. Check that the side seam is still going to match the length of the back piece when the seam is sewn with the facing.
- The long edge of piece 4 will extend beyond the hemmed edge of piece one when folded. You can see the finished detail in the photograph.
- As instruction.
- As Instruction.
- As Instruction (though slight obvious difference if you are making edges equal).
- As Instruction
- As Instruction
- As instruction. I did this by hand to get a nice tidy finish.
- As Instruction. Clean finish as these will be visible.
- As instruction. Also clean finish.
- Don’t think you are getting this wrong when the sleeve seam isn’t level with the side seam – it sits slightly toward the front.
- As instruction – I clean finished.
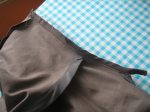
Side seam detail with facing.
- Now is where I sewed the side seam, folding the facing up to enclose the front piece. When the seam is pulled out and pressed towards the back it gives a lovely clean edge.


I tacked the folds into position on the back before pressing, clapping, and leaving the jacket on a hanger overnight to cool and set the creases.
By the time you get here you deserve to go and get a strong drink!
If you are thinking of having a go at making this jacket don’t be put off by the amount of instructions – most of what is done is fairly intuitive, and hopefully what I have been able to supply will help a bit too. Let me know if you make one!
A Management moment at Kew.
I spotted a raffia plant in one of the glass houses at Kew and got quite excited. “Did you use raffia at school when you were little” I asked. He looked faintly bewildered and after further explanation as to the use of raffia he replied
“No. We learned Latin”
That’s me told.

Thanks for all the detailed instructions. I think I am going to take your advice and have the pattern reprinted at a copy shop and save the taping time.
I thought it well worthwhile.
Brilliant and detailed instructions – thank you. It is still a puzzle though. Now, should I sew it?
It’s an interesting design, and a fun sew. Jess is only 5’1″ so I would check the back length of you don’t like short jackets.
This is a very interesting. I am not in the mood for this sort of thing at the moment, but I know I would enjoy making it when I am feeling a bit more patient. Thank you so much for generously sharing your know how and experience Kim.
You are very welcome. I agree that it is necessary to begin the right frame of mind to tackle some projects – this definitely being one of those.
What diligence you had to list everything we need to know about making this pattern…WOW! It looks so complicated and time consuming for those who have never made tailor tacks but well worth the results.
MASSIVE HINT! Don’t skimp on the tacks. Without all of those guides this would be an impossible make. It is one that takes thought but not outrageously difficult.
Thanks for stopping by Mrs Mole 😃